
Tuesday, May 17, 2016
Thursday, May 5, 2016
Photo

Wednesday, April 13, 2016
Film and Camera Pictures

Tuesday, April 5, 2016
Photogram Worksheet
1. You can achieve white on a photogram by placing an object down on the paper that is not see through.
2. You achieve black on the photogram by not placing any objects on the paper and then it will be black, it's also known as negative space.
3.You achieve gray on a photogram by placing an object down that can be seen through like a piece of tissue paper.
4. Photograms are designed in the classroom so you can see what your doing and where your placing your objects.
5. You need to make a test strip first so you can figure out which lighting and timing you need for the big paper.
6. Photograms are referred to as painting with light because you are making picture with lighting instead of using paint.
7. The developer developed the picture and makes the image come out.
8. The stop stops the picture from developing anymore.
9. The fixer stabilizes the image and removes the unexposed silver halide remaining on the film.
10. The fixer remover takes off the fixer so the chemicals aren't still on the film.
11. The final wash cleans the picture and gets rid of the remaining chemicals that are on the film.
Photogram Positive

Tuesday, March 22, 2016
Camera Know How
1. The camera i am using is the Promaster 2500PK. #27
2.
3. The button you use to take a picture is the shutter release button.
4. You change the shutter speed with the shutter speed dial
5. The shutter speeds are 1,2,4,8,15,30,60,125,250,500,1000,2000
6. You change the aperture using the aperture ring.
7. My aperture settings are 22,16,11,8, 5.6,4,2.8,1.7
8. You focus the ring using the focus ring.
9. No the camera does't have a zoom lens.
10. You tell if theres enough light by looking through the viewfinder eyepiece.
11. You adjust the light using the meter.
12. We haven't learned how to bracket yet.
13. The film we use is the 35mm film.
14. The iso setting is used to set the speed of the pictures being taken
15. You rewind film using the film rewind crank and knob.
Tuesday, March 15, 2016
Making Photograms

Thursday, March 3, 2016
Photogram PowerPoint Presentation: Pablo Picasso


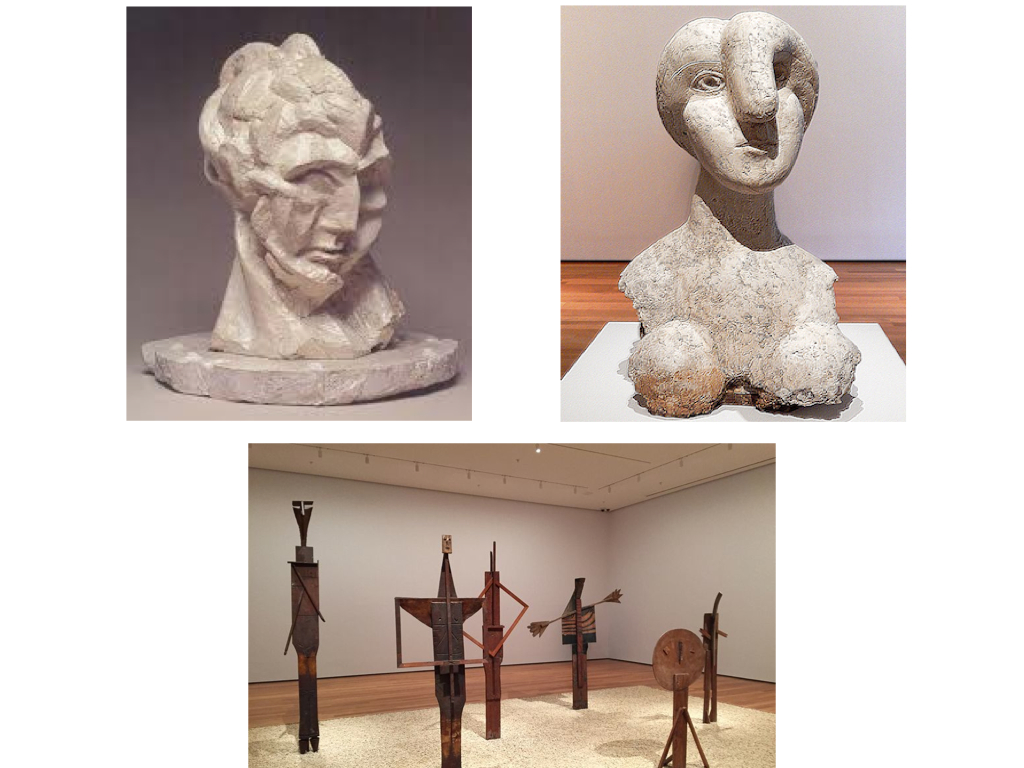


For this powerpoint on photograms, I chose Pablo Picasso to research. I used Keynote for my powerpoint. In my first slide I have the name, career, and an image of my artist. For the next slide I included his date and place of birth with a map of the country he was born in. The next slide explains three major activities he did in his career. Throughout my next three slides i have three images of each of the things he did. On my last slide I have his date and place of death with an image of the country he died in. After i completed my powerpoint I exported the images of each one and put on my post. By creating this powerpoint I learned a lot about photograms and Pablo Picasso.
Monday, February 29, 2016
Positive Image

Tuesday, February 23, 2016
Pinhole Camera Worksheet
1. Camera obscure is also know as the dark room, which is a darkened box with a lens that allows light to come in and out for a picture.
2. A pinhole camera is a light-tight can or object that has a shutter and aperture.
3. The three things a camera has in common is aperture and shutter. They are also light tight, allows no light to come in.
4. The two parts that allow light in are the shutter and the aperture.
5. You test the pinhole camera for light leaks by putting in a new test strip and then taking the camera outside into light. Then you take it back in the dark room and if the strip is still white, then there are no leaks. You can fix by covering with black paper and making sure cap is tight.
6. Camera shake is movement of the camera while you try to take a picture. If the image comes out blurry there was either camera shake or something moving in the picture.
7. Developer is chemicals that bring out the image in the film. It is converted by a chemical reaction.
8. The stop bath removes all the chemicals and stops the chemical reaction process once it;s done developing.
9. The fixer is the last step in the photographic process. It stabilizes the image and removes the unexposed silver halide that remains on the film.
10. You need to agitate the chemicals so they are in a mild even motion while being processed. It prevents spotting, streaking, and staining.
11. You can prevent prints from sticking together by making sure they are clean and store them in a air tight bag.
12. You wash prints to get rid of any remaining chemicals still on the photo. If you didn't wash the image, it may deteriorate after while.
Monday, February 22, 2016
Pin Hole Camera

Wednesday, February 10, 2016
Rules of Composition

Subscribe to:
Comments (Atom)